How to Add a New Student
Navigate to the Students Page
- From the left sidebar, select “Admission System” and then click on “Students” to open the students management page.
Initiate Adding a Student
- Click on the “+ Add Student” button located at the top right of the students page.
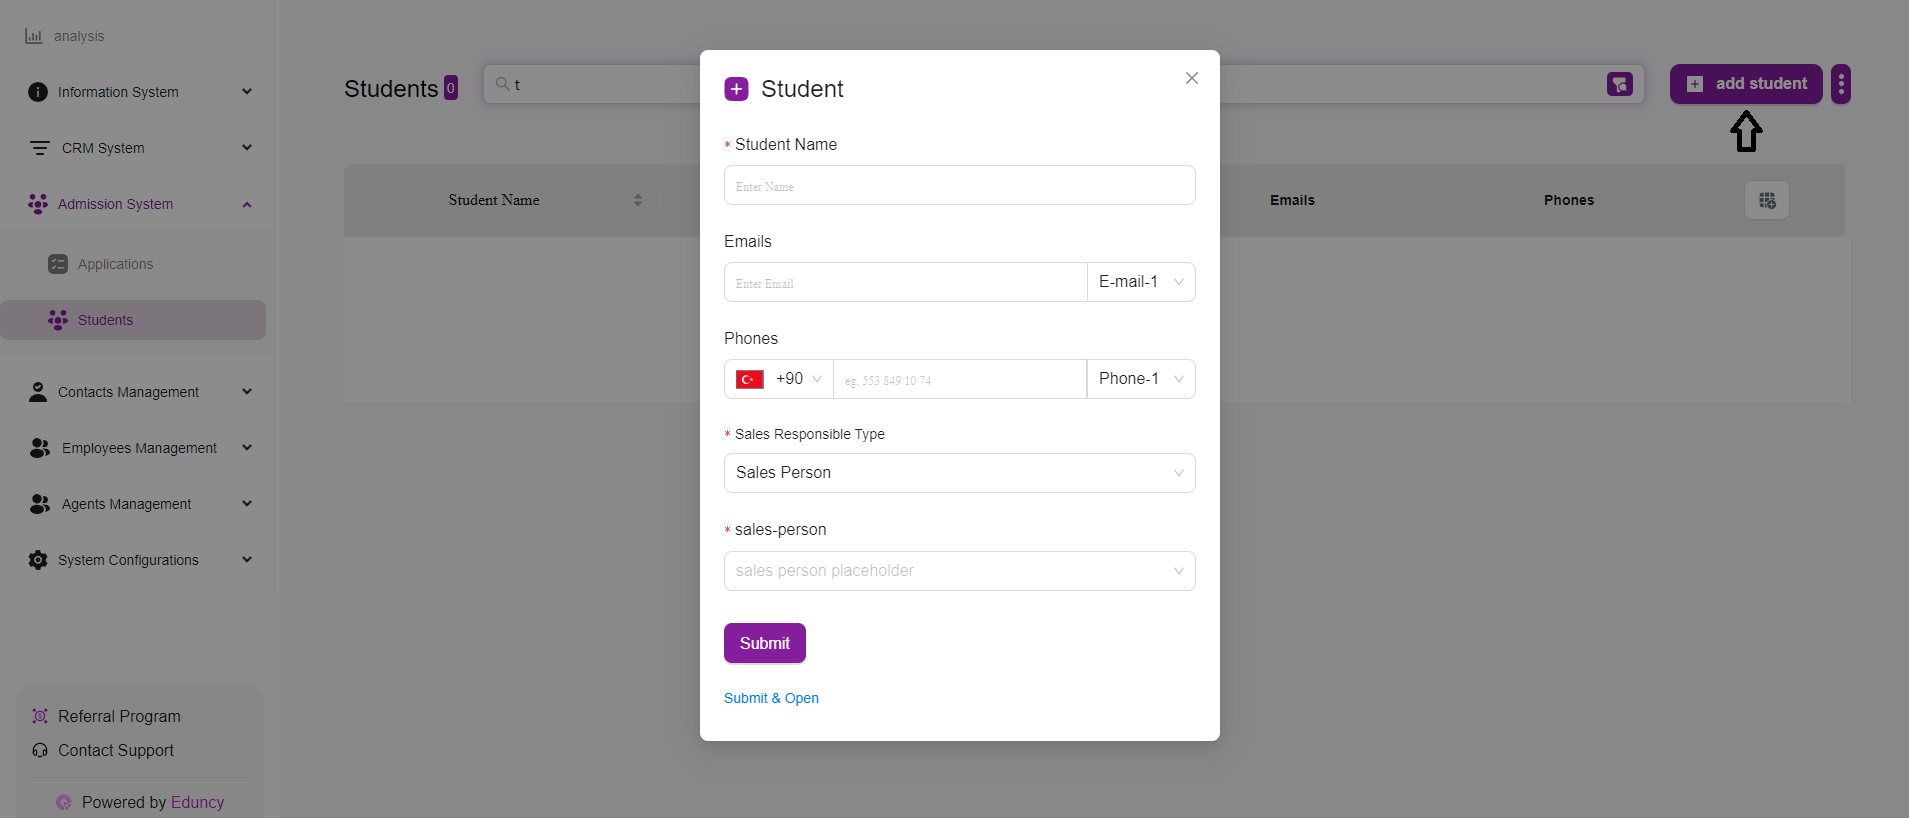
Fill in Student Details
A form will appear prompting you to enter the student’s details.
Enter Basic Information
- Student Name: Enter the full name of the student.
- Emails: Input the student’s email address. You can add multiple emails if necessary by selecting “E-mail-1” or “E-mail-2” from the dropdown menu next to the email field.
- Phones: Enter the student’s phone number. Select the appropriate country code from the dropdown menu and input the number. Additional phone numbers can be added by selecting “Phone-1” or “Phone-2” from the dropdown menu.
Assign Sales Responsibility
- Sales Responsible Type: Select the type of sales responsibility from the dropdown menu (e.g., Sales Person, Manager, Agent, etc.).
- Sales Person: Input the name or identifier of the sales person responsible for this student.
Submit the Form
- Once all necessary information is filled out, click on the “Submit” button to save the student’s details.
- If you need to immediately open the student’s profile after submitting, click on “Submit & Open.”
Tips for Adding a Student
- Accuracy: Ensure all entered information is accurate and complete to avoid issues later.
- Multiple Contacts: Utilize the multiple email and phone fields if the student has more than one contact method.
- Responsibility Assignment: Correctly assign the sales responsible type and sales person to ensure proper tracking and follow-up.
By following these steps, you can efficiently add new students to the Admission System, ensuring their information is properly recorded and managed.